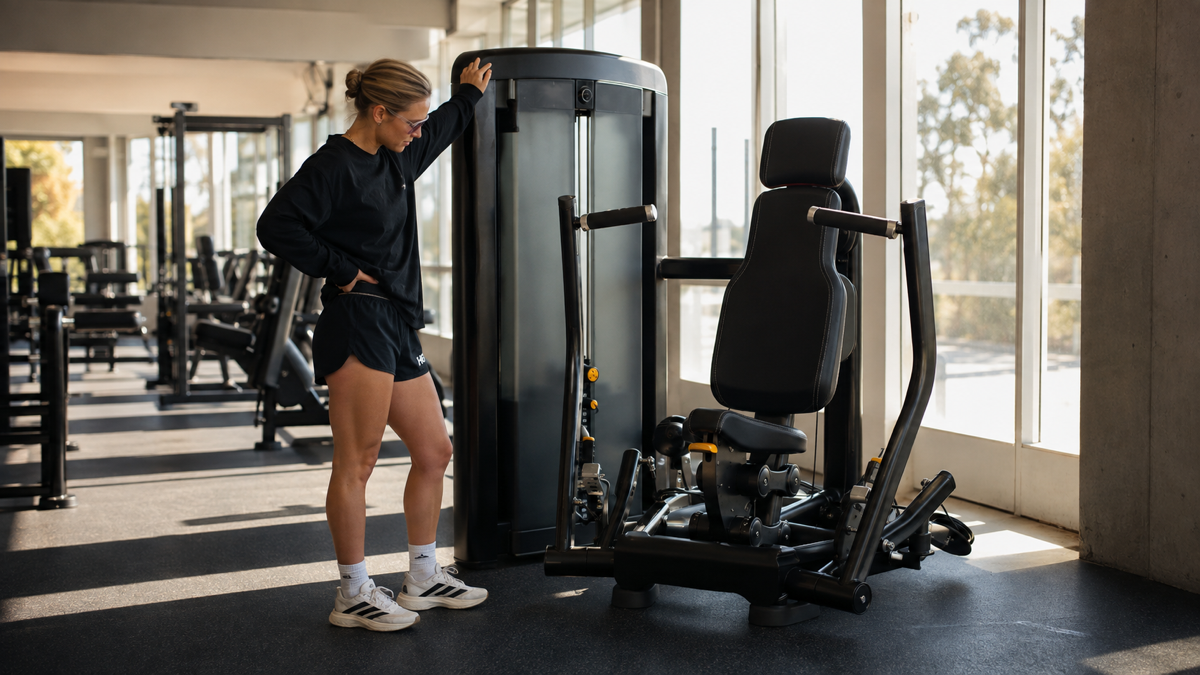
You sit down at a machine, find three yellow levers, and suddenly the tiny diagram on the side looks like an engineering exam. Meanwhile, someone nearby seems to adjust everything in four seconds.
Nothing is wrong with you. Gym machines are easier once you know the same setup pattern works on most of them.
Here is the short answer to how to use gym equipment: read the machine’s instruction placard, check that it looks intact, adjust the seat and pads to fit your body, choose a light resistance, and try a few slow reps. If the movement feels controlled and the machine fits, continue. If it pinches, pulls you out of position, or causes pain, stop and reset.
This guide focuses on the strength machines and cable stations that often cause the most setup confusion. For cardio equipment, learn the stop controls before you increase the pace. With free weights, clear a stable space and choose a load you can pick up and set down with control.
You do not need to learn the whole gym in one visit. Pick three or four machines, save their settings in your phone, and repeat them next time. That is enough to turn a room full of unfamiliar equipment into a short list you know.
Use this six-step setup routine on almost any machine
Learning how to use gym machines is less about memorizing every model and more about following a reliable order. Use these six steps before your first working set.
1. Read the name and movement diagram
Look for the instruction placard on the frame. It usually shows the machine name, the main muscles involved, the start and finish positions, and the available adjustments.
Treat that placard as the instructions for the exact machine in front of you. Two chest press machines can have different levers, handle paths, and seat positions. A video of another model cannot tell you where every pin belongs on this one.
If the label is missing or the movement is still unclear, ask a staff member to demonstrate the adjustments before you add weight. A quick setup demonstration is a normal thing to ask for.
2. Check the machine before you sit down
Take a quick look at the cable, handles, pads, and moving arms. Do not use the machine if a cable looks frayed, a pad or handle is loose, a guard is missing, or the machine is marked out of order. Tell the floor staff and choose another station.
Keep your hands, hair, headphones, and loose clothing away from the weight stack and other moving parts. Leave enough room to get on and off without stepping into another person’s exercise space.
3. Set the seat, back pad, and range
Adjustment handles are often a bright color. Let the weight stack rest and return the moving arm to its start position. Then pull the adjustment pin or lever, move the seat or pad, and make sure it locks fully before you use the machine.
Your goal is not to copy the number used by the previous person. You are trying to line up the machine with your body:
- On a pressing machine, the handles should start around chest or shoulder level, depending on the exercise.
- On a row, you should reach the handles without rounding your back or losing contact with the support pad.
- On a leg curl or leg extension, the machine’s pivot should sit close to the side of your knee joint.
- On a pulldown, the thigh pad should hold you in place without digging in.
- On a leg press, choose a start position that lets your feet stay flat and your hips and back remain supported.
If you cannot find a setting that fits, use a different version of the exercise. You do not have to fold yourself into a machine simply because it is available.
4. Select a light resistance
On a selectorized machine, the pin chooses how many plates will lift. Insert it completely into one hole while the weight stack is resting. Do not leave it halfway in or move it while the plates are raised.
On a plate-loaded machine, add plates to the loading pegs. Load both sides evenly unless the machine’s own instructions say otherwise, and use the required collars or stops. If you are not sure how the arms release from their supports, ask before loading the machine.
Start lighter than you think you need. The number on one machine does not translate neatly to another, so it is not useful as a score.
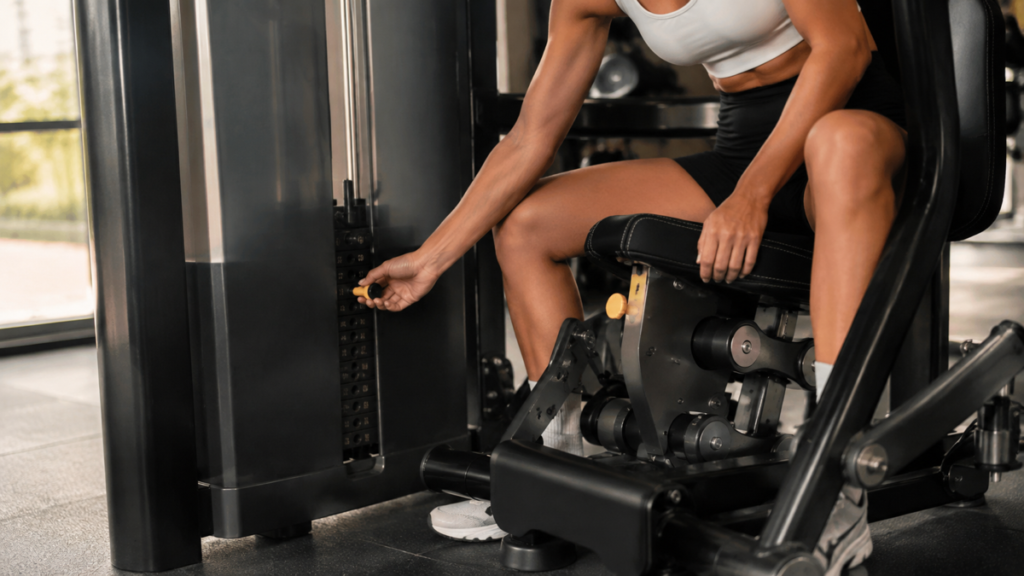
5. Do a few test reps
Sit or stand in the position shown on the placard. Brace your feet, keep your body against the intended supports, and move the handles or platform through a comfortable range.
Use a smooth pace. Do not let the stack slam down between reps. During the test, notice three things:
- Can you keep the same body position from start to finish?
- Does the machine move smoothly without a joint feeling pinched or forced?
- Can you control both the lifting and returning parts of the rep?
If the answer is no, stop and change one variable: the seat, the pad, the range, or the resistance. Testing is part of the setup, not a failed set.
6. Record the settings that worked
Write down the machine name, seat or back-pad number, resistance, and reps. Add a short note if the machine has an unusual handle or location.
For example: Seated row near windows — seat 4, chest pad 3, 20 lb, 10 reps.
Those details remove decisions from your next visit. They also help you notice progress without relying on memory.
Know what type of gym equipment you are using
You do not need to memorize every machine. Start with a few basic equipment types.
| Equipment type | How you recognize it | What to set first | Beginner watch-out |
|---|---|---|---|
| Selectorized strength machine | Weight stack with a removable pin | Seat, pads, range, then weight pin | Make sure every adjustment is locked and the selector pin is fully inserted |
| Plate-loaded machine | Large pegs for round weight plates | Seat and start position, then plates | Load and unload evenly; learn how the supports release before the set |
| Cable station | Adjustable pulley with clips and attachments | Pulley height, attachment, then weight pin | Confirm the clip is closed and stand clear of the weight stack and cable path |
| Cardio machine | Console with speed, resistance, or incline controls | Easy start setting and stop controls | Learn the stop button before increasing speed or resistance |
| Free weights and bench | Dumbbells, kettlebells, barbells, adjustable bench | Clear space and stable bench position | Use a load you can lift into and out of position without swinging or dropping it |
Selectorized machines often feel approachable because the path is guided and changing the load takes one pin. That does not make every machine a perfect fit, and it does not make free weights an advanced-only option. For general strength training, research reviewed by the American College of Sports Medicine did not find one equipment type consistently superior across the outcomes studied.
Choose equipment you can access, adjust, and repeat with control. Familiar is useful. Fancy is optional.
How to set up common gym machines for beginners
The placard on the exact model always comes first. Use the cues below to understand what you are trying to line up, then adapt them to the machine in your gym.
Leg press
Adjust the seat so your knees and hips begin in a comfortable bent position. Place both feet flat on the platform, around hip- to shoulder-width apart. Keep your hips and back against the pads as you press the platform away.
Straighten your legs with control, but do not snap or force your knees into a locked position. Return only as far as you can while your feet stay flat and your pelvis remains supported.
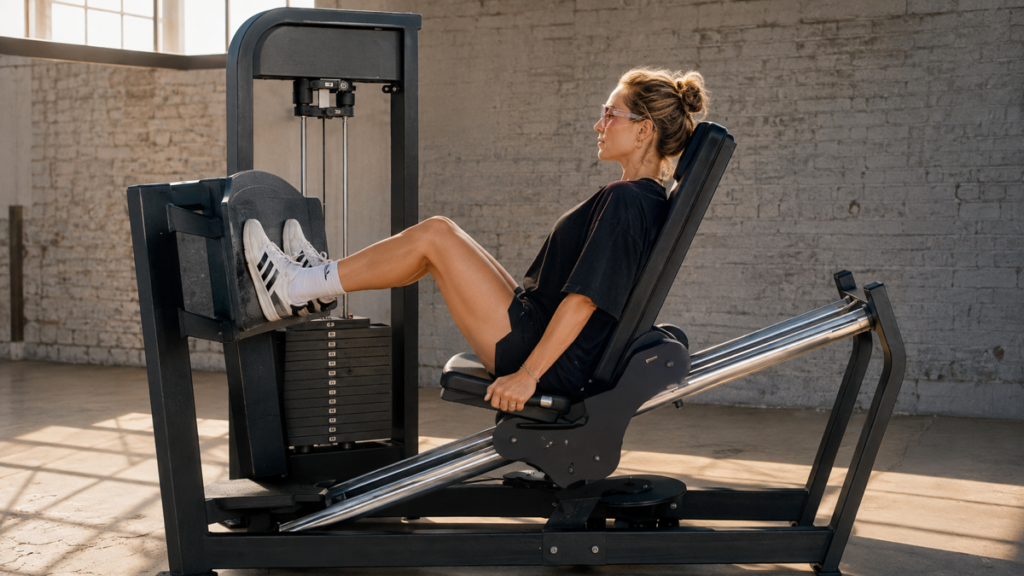
Reset if: your heels lift, your hips curl off the pad, your knees hurt, or the starting position feels cramped.
Seated chest press
Set the seat so the handles begin around mid-chest and your wrists can stay in line with your forearms. Keep your feet down and your back supported. Press forward smoothly, then return without letting the weight stack crash.
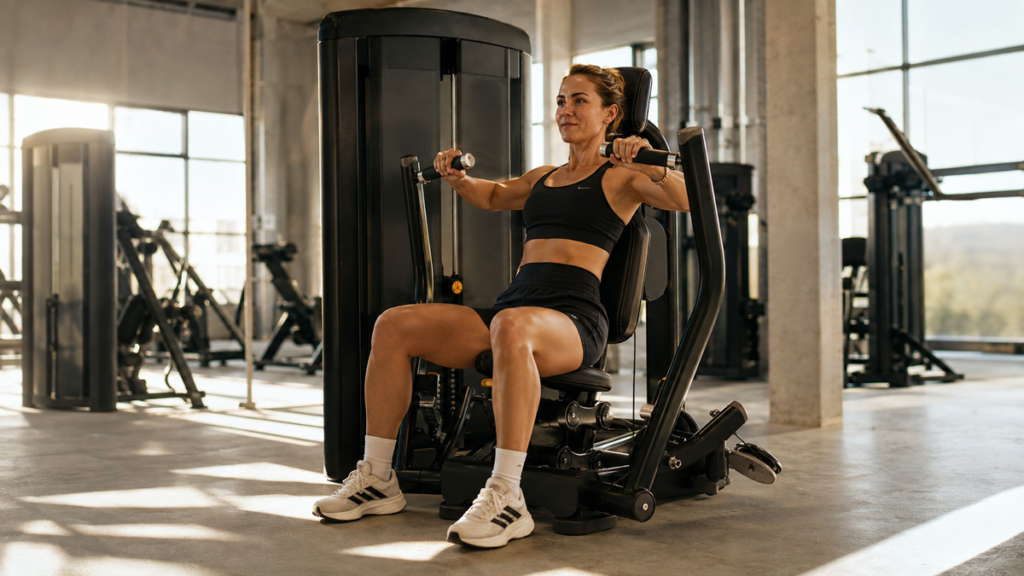
The handles do not need to travel as far back as possible. Use a range that lets your shoulders stay comfortable and supported.
Reset if: the handles sit near your neck or stomach, your shoulders roll forward, or you have to arch away from the pad.
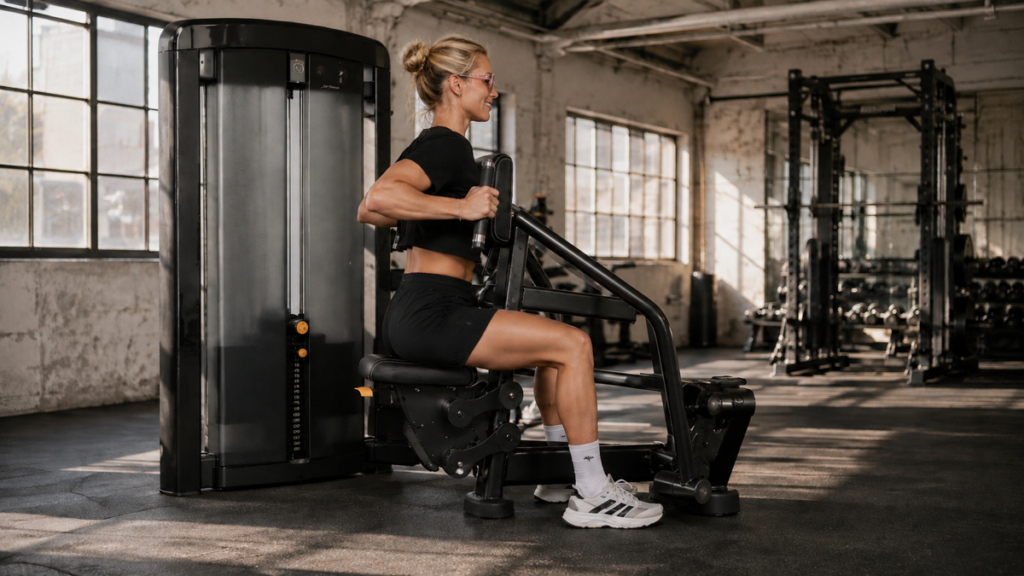
Seated row
Set the seat so the chest support meets your mid-chest. Adjust the chest pad, if possible, so you can reach the handles with long arms without rounding forward.
Keep your torso supported and pull your elbows back through a range you can control. Return slowly until your arms are long again without letting the weight pull your shoulders or torso forward.
Reset if: you cannot reach the handles without slumping, the chest pad limits your breathing, or your torso rocks with every rep.
Lat pulldown
Choose the resistance before you sit. Hold the handles or bar, sit down, and adjust the thigh pad so it keeps you stable without pressing painfully into your legs.
Start with your arms overhead and keep your torso upright rather than leaning far back. Pull until your elbows come toward your sides and the handles reach about shoulder level, or follow the end position shown on your model. Return with control.
Reset if: your body swings, you have to lean far back, the thigh pad does not hold you down, or you pull the bar behind your neck.
Seated leg curl
Adjust the back pad so the side of your knee lines up with the machine’s pivot. Place the lower pad behind your ankles and bring the thigh pad down until it feels secure, not crushing.
Hold the handles, keep your hips down, and bend your knees to draw the ankle pad down and back. Let it return slowly.
Reset if: the pivot sits well above or below your knee, the roller presses directly on your heel, or your hips lift to move the weight.
Cable station
Set the pulley height while the stack is resting. Clip on the correct attachment and make sure the carabiner closes. Select a light load, take hold of the attachment, and step into a stable position before you begin.
Keep the cable running in a clear line. Do not put fingers near the pulley, stand under an attachment someone else is changing, or let go while the stack is raised. Walk the handle back to its start position when you finish.
Ready to choose movements rather than decode equipment? This list of gym exercises for beginners explains the purpose and form of eight practical options.
How to choose your starting weight
Your first weight is a test, not a commitment. Pick a load that looks almost too easy and try a few controlled reps after you finish the setup.
If the machine fits and those reps feel steady, continue for a few more controlled reps. End the set before your form changes. The last reps can feel challenging, but they should still look controlled.
Lower the resistance if you have to:
- jerk the handles or bounce the platform;
- hold your breath through the whole rep;
- shorten the range suddenly;
- lift away from the seat or support pad;
- rush the return because you cannot control it.
You do not need to reach complete muscle failure to make a set count. When all your planned reps look controlled for more than one session, increase the load by the smallest available step and test again. Change one thing at a time so you know what worked.
Machine labels may use pounds or kilograms, and two stacks with the same printed number can feel different. Record the setting for that specific machine rather than comparing numbers across the gym.
A simple way to practice on your first visit
Do not turn your first equipment lesson into a tour of every machine in the building. Choose one station from each of these categories:
- a lower-body push, such as a leg press;
- an upper-body push, such as a chest press;
- an upper-body pull, such as a seated row;
- one optional second lower-body move, such as a seated leg curl.
If easy walking or cycling helps you settle in, keep the pace comfortable. Then set up each machine, do a few test reps, and complete a short controlled set if the setup feels right. Rest until you can begin the next exercise without rushing.
The goal of this visit is to learn a few setups, not cover the whole room. Four machines are enough for one useful practice session. If you want the exercises arranged into a repeatable session, follow this beginner gym workout with machines.
Stop the exercise if you feel pain, dizziness, faintness, chest pressure, or unusual shortness of breath. If a movement simply feels awkward, lower the weight and reset the machine. If it still does not fit, skip it and choose another option.
What to do when the gym is busy
A full gym can make a simple plan feel surprisingly complicated. Keep the training goal, not one exact machine.
- Your machine is occupied: move to the next exercise and return later, or ask, “How many sets do you have left?”
- Someone is resting beside it: ask before changing the pin or seat. They may still be using it.
- You cannot find the adjustment lever: check both sides and under the seat, then ask staff instead of forcing a part.
- The machine is marked out of order: do not test it. Choose another exercise and let the staff know if needed.
- Someone left plates on a machine: confirm that the station is free before unloading it. Remove plates in small, alternating steps so one side is not suddenly much heavier.
- You only have 20 minutes: practice two or three machines well. Learning fewer settings is more useful than racing through six.
You can also save one swap for each exercise in your notes. A chest press can become a wall or incline push-up. A seated row may become a light cable row. A machine being busy does not cancel the whole session.
Common gym-equipment mistakes and quick fixes
Copying the previous person’s settings
Their seat number, range, and weight fit their body and session. Reset the machine from scratch, even if you are similar in height.
Adding weight before checking the fit
The wrong seat position becomes harder to notice once you are focused on moving a heavy stack. Adjust first, test light, then add resistance.
Moving as far as the machine allows
The mechanical limit is not your personal target. Use a comfortable range you can control without your feet, hips, back, or shoulders losing their intended support.
Letting the stack slam
A loud landing often means the return is too fast. Slow down before the plates touch. If you cannot, reduce the load.
Changing several settings at once
If the movement feels wrong, adjust one variable and retest. Start with the seat or back pad, then the range, then the weight. Otherwise, you will not know which change helped.
Treating every machine number as comparable
Pulley systems, lever arms, and machine designs change how a load feels. Compare your progress on the same model whenever possible.
Make the next visit easier than the first
Learning how to use workout machines does not require a perfect memory or a fearless first day. One familiar setup at a time is enough.
Your next step is simple: return to the same three machines, use your notes, and change only one variable at a time. Those rows of levers and pins will start to look less like one giant puzzle and more like individual tools you know how to use.