
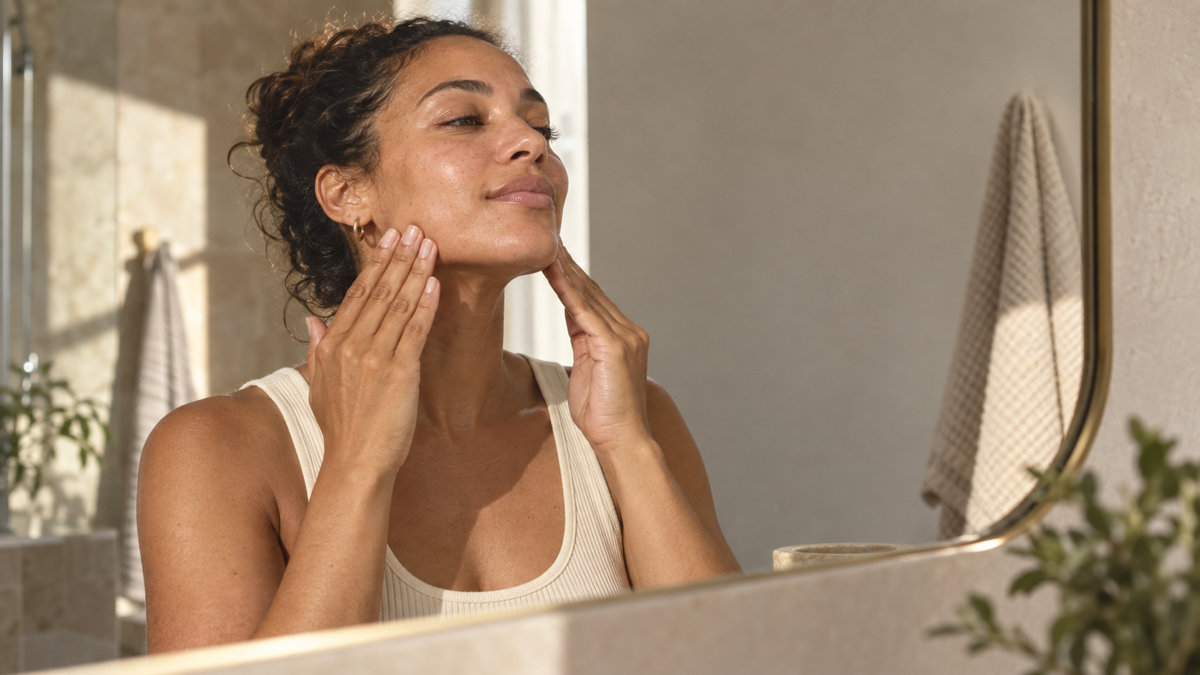
Jawline Massage: A Gentle 5-Minute Hands-Only Routine
12 min readYou finish your skin care, catch your side profile in the mirror, and wonder whether a few firm strokes could make your jaw look sharper by morning. Online routines often turn that small question into a workout: scrape harder, pinch faster, repeat until your face feels thoroughly “sculpted.” Your jaw does not need that kind of ambition.
A simple jawline massage should feel comfortable, not corrective. With clean hands and enough moisturizer for slip, use the flats of your fingers to make slow strokes from the center of your chin toward your ears. Keep the pressure light, lift your hands to reset, and stop after about five minutes.
This jawline massage may feel relaxing and can leave the skin temporarily warm. What it cannot do is remove fat, erase a double chin, lift jowls, change bone structure, or create a permanently sharper jaw. The useful goal is a gentle, repeatable skin care ritual—not a new facial anatomy.
What can jawline massage realistically do?
The honest answer is modest. A short massage can feel pleasant, spread a familiar moisturizer, and briefly increase warmth or color where your fingers move. You may also notice that you have been holding your mouth rigid or pressing your teeth together, then choose to let your jaw rest while you finish the routine.
Direct evidence that hands-only massage defines the jawline is limited. A small facial-roller study found that five minutes with a facial roller increased blood flow in the treated cheek for at least ten minutes. That study used a tool, included only 12 people in the short-term test, and did not measure a sharper jawline.
A 2025 systematic review looked at 12 small studies of facial exercises, myofunctional therapy, and manual massage. Some reported changes in specific areas, including the jawline, but methods and outcomes varied. The reviewers concluded that the evidence was not strong enough to confirm reliable facial rejuvenation effects.
One tiny pilot study also measured facial soft-tissue changes after two weeks of self-massage. It included only five people and focused on the cheeks, not a stand-alone jawline routine. Interesting? Yes. Proof that your chin-to-ear glide will permanently reshape your lower face? No.
If you want to build a broader hands-only routine, start with these gentle facial massage techniques. For a closer look at what current studies do and do not support, read our guide to realistic facial massage benefits.
Results that make sense
After a comfortable session, your lower face may feel less rigid and your skin may look a little warmer. If you began with mild, familiar puffiness, the outline of your jaw might look subtly different for a short time. Neither effect is guaranteed, and a mirror check immediately after rubbing the skin is not evidence of lasting change.
Massage does not break down or remove facial fat. It cannot move the buccal fat pad, tighten loose skin on command, rebuild collagen in five minutes, or alter the jawbone. It is also not a treatment for temporomandibular joint disorders, jaw clenching, headache, facial pain, or stress.
That boundary keeps the routine useful. You can enjoy the touch without turning every session into a before-and-after test.
Before you massage your jawline
A good setup takes less than a minute. It also prevents the most common problem: dragging fingers over dry or irritated skin while concentrating on the direction of the stroke.
Prepare with this checklist:
- Wash your hands with soap and water, including between your fingers and under your nails, then dry them well.
- Cleanse your face and remove makeup or gritty product residue.
- Take off rings that could scratch your skin and check that your nails are smooth.
- Apply a familiar moisturizer, balm, or facial oil that lets your fingers glide without pulling.
- Sit or stand in a comfortable position where you can relax your shoulders.
- Use a mirror for the first few sessions so you can see whether the skin is bunching or becoming very red.

Do not introduce a strong new skin care product and a new massage technique in the same session. If your face becomes irritated, you will have a harder time telling whether friction or the product caused it.
Skip the routine over open, broken, sunburned, bruised, infected, or actively irritated skin. Pause it during a rosacea flare or any time rubbing makes your redness worse. If your aftercare instructions say not to touch or massage the area, leave it alone until that restriction ends.
How much slip do you need?
Place two flat fingertips beside your chin and make one slow test stroke toward the ear. Your fingers should travel smoothly while staying in contact with the skin.
If the skin folds, skips, or feels hot from friction, add a small amount of product or end the session. More product is not always better: a slippery layer that makes your hands slide out of control is not useful either.
How light should the pressure be?
Start lighter than you think. Use enough contact to move across the surface without digging into the tissues underneath. You should be able to breathe normally and keep your teeth apart.
Light pinkness that fades can happen after rubbing the skin. Pain, burning, bruising, numbness, a lingering red mark, or increased irritation means the pressure or friction was too much. Stop rather than trying to “finish the set.”
The front and sides of the neck need special care. This routine stays on the lower face and the bony edge of the jaw; it does not press into the throat.
How to do a five-minute jawline massage
This jawline routine uses only your hands. Work on one side and then the other, or use both hands at the same time if that feels coordinated. Three to five passes per movement is plenty for a first session.
Move slowly in one direction. Lift your hands off the skin to return to the starting point instead of rubbing back and forth.
1. Check your resting position — 30 seconds
Sit upright without pushing your chin forward. Let your shoulders drop. Keep your lips softly together or slightly apart, with a little space between your upper and lower teeth.
Take two ordinary, unforced breaths. The goal is not to perform a relaxation exercise or correct your posture. You are simply choosing a comfortable position before your hands begin moving.
2. Warm the lower face with flat-hand contact — 45 seconds
Place the flats of your fingers across the lower cheeks, with your fingertips pointing toward your ears. Make two or three light glides from beside the corners of your mouth toward the middle of each ear.
This first pass spreads your product and tells you whether there is enough slip. If your hands catch, fix that now. Do not compensate by pushing harder.
3. Glide from chin to ear — 75 seconds
Place two or three fingers beside the center of your chin, just above the edge of the jawbone. Glide outward along the jawline toward the earlobe. Keep the fingers broad and relaxed rather than leading with your nails or one pointed knuckle.

Lift your hand, return to the chin, and repeat three to five times. Then switch sides. The direction is center to outer face; there is no need to drag the skin back toward the chin.
When people search for how to massage the jawline, this is usually the move they expect. The useful details are less glamorous than the dramatic version: enough slip, light pressure, and a clean reset between strokes.
4. Use small circles over the side of the jaw — 60 seconds
Find the fleshy area of the cheek just in front of the ear, above the back corner of the jaw. Rest two fingertips there and draw small, slow circles with comfortable pressure. Move a fingertip-width forward and repeat.

Stay on the soft cheek area rather than pressing directly into the jaw joint or digging under the jawbone. Keep the movement easy. This step may feel pleasant, but it is not intended to treat clenching, TMD, or pain.
5. Add a lower-cheek pass — 60 seconds
Place your fingers beside the chin again, this time slightly higher on the lower cheek. Glide diagonally outward toward the middle of the ear. This expands the movement from the narrow jaw edge into a simple massage across the lower face and jaw without turning it into a full-face routine.
If you also want a light cheekbone pass, make one optional higher stroke from beside the nose across the cheek toward the temple. Use lighter pressure as you move upward and keep your fingers away from the eye itself. Skip the extra pass if you want to keep the routine focused on the lower face.
6. Finish with soft outward strokes — 30 seconds
Return to the chin and make two final strokes along each side of the jaw toward the ears. Then rest your hands in your lap and notice how your skin feels.

If it feels comfortable, you are done. You do not need to add pinching, knuckle scraping, a tool, or another five minutes to make the routine count.
Which direction should you massage your jawline?
For this cosmetic routine, move from the center of the chin outward toward the ears. That direction is simple, easy to repeat, and reduces the temptation to scrub the same strip of skin back and forth.
“Up and out” is often presented as a rule that physically lifts the face. It is better understood as an instruction for organizing your strokes, not a promise that gravity can be reversed with your fingertips. Direction will not change your bone structure or lock soft tissue into a higher position.
You may see drainage routines that start at the collarbones, travel down the neck, or use feather-light skin-stretching movements. Those belong to a different search intent and technique. This is a straightforward external jawline massage, not manual lymphatic drainage.
Keep this routine external
All movements in this guide stay on the outside of your face. Do not put fingers inside your mouth or squeeze cheek tissue between an internal and external hand.
Inside-mouth work is a separate technique with different hygiene and consent considerations. If that is what you meant to research, read our guide to buccal massage before deciding whether it matches your goal.
This routine also leaves out gua sha stones, rollers, electric massagers, and scraping tools. A tool is not required for a useful session, and adding one changes the pressure, grip, cleaning, and technique questions.
Common jawline massage mistakes
Pressing hard enough to chase definition
More pressure does not remove more fat or create a stronger lift. It raises the chance of soreness, irritation, broken skin, or bruising. If your fingers leave dents or you tense your shoulders to push, lighten the touch.
Pinching the jaw edge
Pinching looks precise on camera, but it can be uncomfortable and is not necessary for a beginner routine. Flat fingers distribute pressure more evenly and make it easier to notice drag.
Massaging dry skin
Repeated friction can leave skin hot and irritated. Use a product your skin already tolerates, and stop when the slip runs out instead of forcing one last round.
Scrubbing back and forth
Choose one smooth direction, lift, and reset. Fast sawing adds friction without making the session more effective.
Digging into the jaw joint or throat
The joint sits in front of the ear, and the throat is not part of this cosmetic routine. Work over comfortable areas of the lower cheek and along the bony jaw edge. Skip any spot that feels painful, numb, or unusually tender.
Turning a five-minute ritual into a daily inspection
Different lighting, camera distance, head position, hydration, and ordinary day-to-day puffiness can all change how your jaw looks. Constant photos may make tiny differences feel more meaningful than they are. Judge the routine by comfort and skin tolerance, not by whether every session produces a sharper angle.
How often can you do it?
There is no research-backed schedule for this exact hands-only routine. Start with one or two sessions a week and see how your skin responds. If your face stays calm and the massage feels comfortable, you can try it more often.
Daily massage is not a requirement. Skip a day when your skin feels sensitive, dry, sunburned, or irritated. A shorter routine is also valid: repeat only the chin-to-ear glide during your normal moisturizer step and stop after a minute.
Consistency does not turn temporary effects into permanent structural change. It only makes the habit more familiar. If the routine stops feeling good, there is no benefit in keeping a streak alive.
FAQ
Can jawline massage remove a double chin or jowls?
No. Massage cannot remove fat, tighten loose skin permanently, change the jawbone, or erase jowls. It may briefly change how mild puffiness looks, but that is different from reducing a double chin or restructuring the lower face.
Do you need oil for a jawline massage?
No specific oil is required. A moisturizer, balm, or facial oil you already tolerate can work if it provides enough slip. Avoid heavily fragranced or unfamiliar products when you are testing a new routine.
Can you combine jawline and cheekbone massage?
Yes, if both areas feel comfortable. Complete the jawline strokes first, then add one light pass across each cheek toward the temple. Keep the touch softer as you move closer to the eyes, and do not expect the combined routine to reshape either area.
Your easiest first session
Tonight, keep it simple: wash your hands, apply your usual moisturizer, and make three slow chin-to-ear glides on each side. Use flat fingers and comfortable pressure. That is enough to learn the movement without turning your mirror into a test.
If your skin stays calm, add the small circles and lower-cheek pass next time. The best jawline massage is not the most intense one. It is the one that fits into your routine, feels good while you do it, and asks your fingertips to do only what fingertips can realistically do.